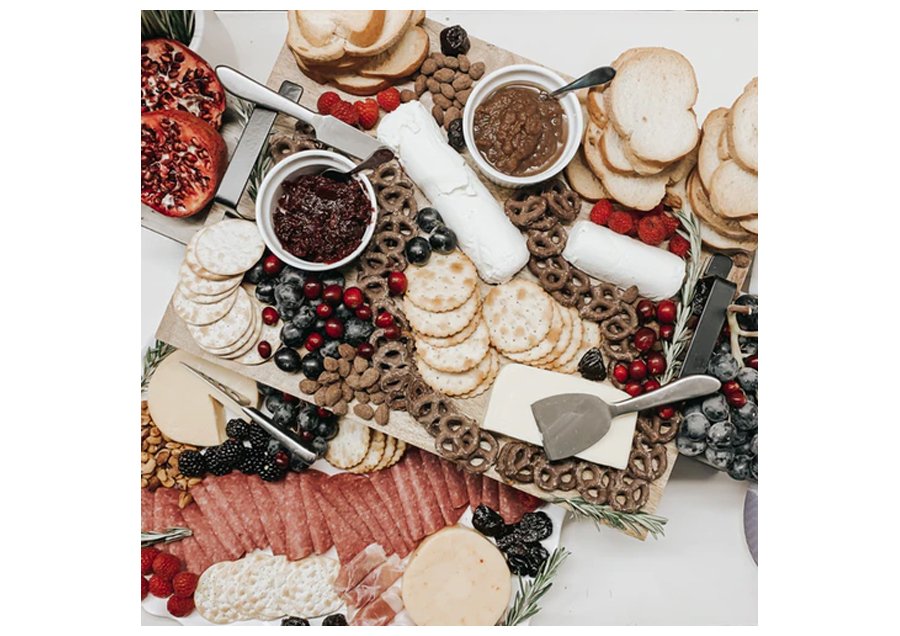
Making Cheese at Home
A lot of people love cheese. If you’re one of them, perhaps you have thought about how they were made and why they are so irresistibly delicious. You might have imagined yourself making your own cheese once you had the time, the equipment and the will to do it. But if not, we’re here to tell you that yes, you can make your cheese at home!
Creating your own cheese can be overwhelming at first because there are a lot of types and variations of cheese, and they are all made differently. However, home-making a cheese is not at all intimidating as you think. As long as you’ve got milk and heat, you can easily get the curds and transform them into your own cheese. Besides milk, you would only need vinegar and salt for the most basic cheese recipes. It makes a perfect hack if you ran out of cheese and you don’t want to buy, or if you just want to try something new to impress your friends who are coming over.
Truth is, you can make most types of cheese at home, but hard cheeses would need a little more ingredients and processing efforts. You can find a lot of homemade cheese recipes online and in bookstores, but you can start with fresh and unripened soft cheeses.
Homemade Fresh Cheese
Here’s a basic recipe to start with. This fresh cheese is comparable to ricotta.
Ingredients:
- 1 gallon of milk (preferably whole pasteurized cow’s milk)
- ½ cup white vinegar or 1 cup lemon juice
- 2 teaspoon of salt
- Herbs (optional)
Procedure:
1. Boil the milk.
Once you have chosen the milk to use, put it on a pot and let it boil. You need to see bubbles forming around the edges. Also, stir it constantly to prevent it from burning.
3. Add the acid and let it curdle.
Once you see the milk boiling, add the white vinegar or lemon juice while still stirring. This will help separate the whey from the curds. The time it will take you to fully separate them from each other would depend on the milk and acid you use, as well as the temperature. On average, this step would take around 10 to 20 minutes.
If it isn’t curdling, you can add more vinegar or lemon juice and let the whey separate. The whey would look like a thin, yellow-green liquid.
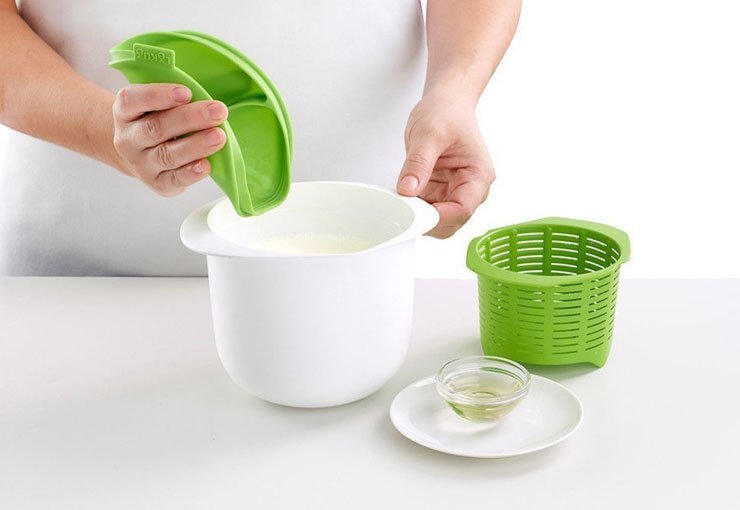
3. Drain and rinse the cheese.
While the milk is separating into curds and whey, line a strainer or a colander with two layers of cheesecloth over a large bowl. If you have no cheesecloth, a clean kitchen towel will do. After the milk has separated, pour them on the strainer you prepared to catch the curds. Make sure to keep the whey separated and then rinse the curds with cold water to remove the acidic flavor and give it a good texture. Then, lift the cheesecloth or towel, tie it up and squeeze out remaining whey and water gently.
4. Season the cheese.
To add flavor, add two teaspoons of salt. If you want it to be more salty, make it three teaspoons. You can add other seasonings like pepper and chives.
5. Dry the cheese.
Once you have seasoned the cheese, wrap it in cheesecloth and let it cool down for at least an hour or two before storing it into the fridge. You can crumble it after or keep it in a ball shape. You can get the best flavor right after it was made, but its shelf life can last for a week.
Cheesemaking Equipment
If you would find cheesemaking a great hobby, or perhaps even a source of income, then you need to invest in good equipment so that you to make great quality cheeses. Here are some of the essential tools for cheesemaking at home:
1. Large pot
Cheese recipes usually need one to two gallons of milk, plus a few cups of additional ingredients (and you need to stir them well) so the pot should be large enough to contain them. It should be made of stainless steel or any unchipped enamel, not of aluminum and other reactive metals.
2. Measuring spoons and cups
For a more accurate cheesemaking, you need measuring materials for ingredients. Its best if you would invest in measuring cups and spoons made from glass or stainless steel, but those made of nylon or sanitized plastic would be nice too.
3. Long-handled spoon
A long-handled spoon is used for stirring and scooping curds, and adding rennet or starter culture. The best material to use as a spoon is bamboo spoon, since it is non-reactive and easy to clean. Stainless steel spoons are great, too.
4. Large bowl
A large bowl is used for catching whey and for heating milk. It must be large enough to contain up to 13 quarts.
5. Cheesecloth and butter muslin
Cheesecloth and butter muslin are used for draining cheese and other cheesemaking tasks. Yes, you may use a clean kitchen cloth or a cotton t-shirt, but cheesecloth is called as such for a reason – it is meant for cheese. If you are going to make cheese more often, use it or a butter muslin, which looks like medical gauze.
6. Colander or strainer
Colander is very useful for the kitchen, and very important when making cheese. Use colander or strainer made from non-reactive materials like stainless steel, plastic or enamel.
7. Thermometer
There are cheeses in which you need to achieve and maintain a certain temperature while it is being cooked, so you will need a thermometer for cheesemaking. There are two types you can use: the basic or waterproof digital thermometer. Some thermometers have a clip that can be attached to the side of the pot.
Tips for Making Cheese at Home
To make the best homemade cheeses, remember this cheesemaking tips:
1. Maintain cleanliness.
The first thing to concern yourself with before making cheese is cleanliness. Your tools and equipment must be thoroughly clean and sterilized, and it must be easy to clean as well. You may use cleaning substances like bleach, but it is better if you would use vinegar and bicarbonate soda. Boil your utensils in them for 15 minutes and let them dry naturally to prevent wild molds from unintentionally forming in your cheese. Also, keep your hands clean before handling the cheese – it’s much better if you would give them a good scrub.
2. Allot enough time.
Before making cheese, make sure you take into consideration all the process in making cheese like renneting, culturing the milk, stirring, milling and pressing. When making a simple hard cheese, spare at least four to five hours. Some complex cheeses would take longer to make, such as those that need pressing.
3. Prepare.
Before you start making cheese, make sure all ingredients, tools and equipment are at hand’s reach. It’s not good to leave your milk boiling unattended, while you are figuring out where your vinegar or colander is.
4. Choose whole milk.
The best types of milk you can use for cheesemaking are not those you can see on your grocery aisles, but those you can buy from local farms. Fresh, whole milk from grass-fed animals will produce the best flavor, but you can use store-bought milk, too. Fresh, raw milk is also flavorful, but these are hard to find (unless you live in or near a dairy farm, of course). You also have to pasteurize raw milk yourself because the native bacteria may compete with the specific bacteria or molds you need for aging your cheese. Low fat milk also works, but it produces less cheese. Just avoid ultra-pasteurized milk because it won’t coagulate or form curds.
5. Start with simple cheeses.
If you’re a beginner, start on easy-to-make fresh cheeses before trying out those marbled blues and aged goudas, because they are made of simpler ingredients and requires lesser steps to do. You have to be open to possible failures when you are starting, so it would be less regrettable if you invested less money and effort if such incidents would happen. It’s also better to master those simple processes so that you can practice your cheesemaking skills easier. Then, you can confidently start creating something harder next time.
6. Don’t be afraid to try something new.
Once you have tried and done the basics fairly consistently, don’t hesitate to experiment by adding other flavorings to the cheese like herbs, peppers and chili to spice it up a little. Also, if you had successes with direct-acid fresh cheeses, start trying out those that needs cultures for aging, such as cottage cheese, feta and chevre. These are the types of cheese you can work on to learn about salting, pressing and aging cheese.
7. Connect with other cheesemakers.
You are lucky to live in a digital world where information can be gathered in just a few presses and clicks. If you are getting fonder of cheesemaking, join those social media groups of cheese lovers and enthusiasts, and read about their tips and experiences. Your learnings could help others, too. You can also be led to cheese-centered blogs that can give you great new ideas and tips for cheesemaking. Have a “support group” whom you will comfortable to reach out to during your cheesemaking journey.
8. Attend a cheesemaking course.
See if you can find a local cheesemaking course on your community. There are probably a lot of awesome things you won’t learn by reading and won’t even think of trying, but can only be learned from an expert teaching you face-to-face. You can also remember how to do stuff better this way. The knowledge you will be priceless, no matter how expensive or cheap your course will be.